Kumar A. ADempiere 3.6 Cookbook
Подождите немного. Документ загружается.

ADempiere Customization – Part I
48
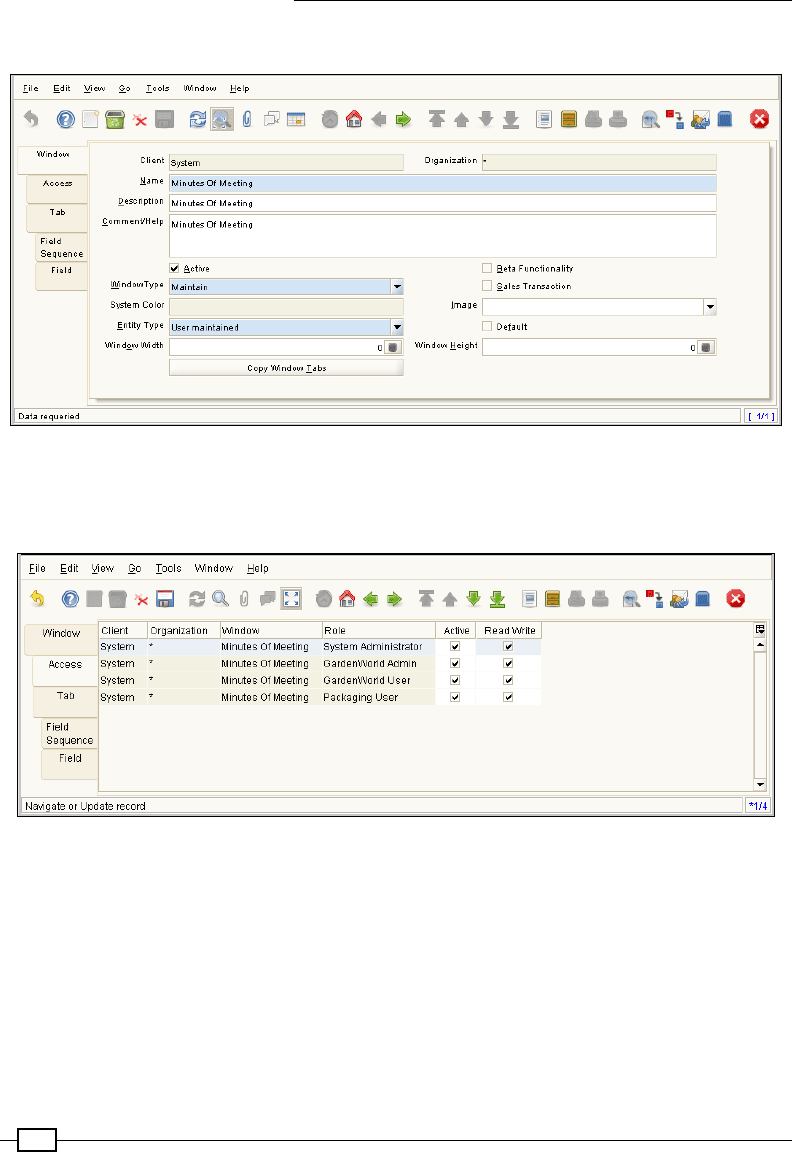
11. Enter the values on the Window tab, as shown in the following screenshot:
12. Verify the window access on the Access tab. By default, the access is given to all the
roles in the system, as shown in the next screenshot. If you want, you can control the
access using the Active eld. However, for now, let us go ahead with the default.
13. Now that we have created the window, we will move on to creating tabs within
the window.
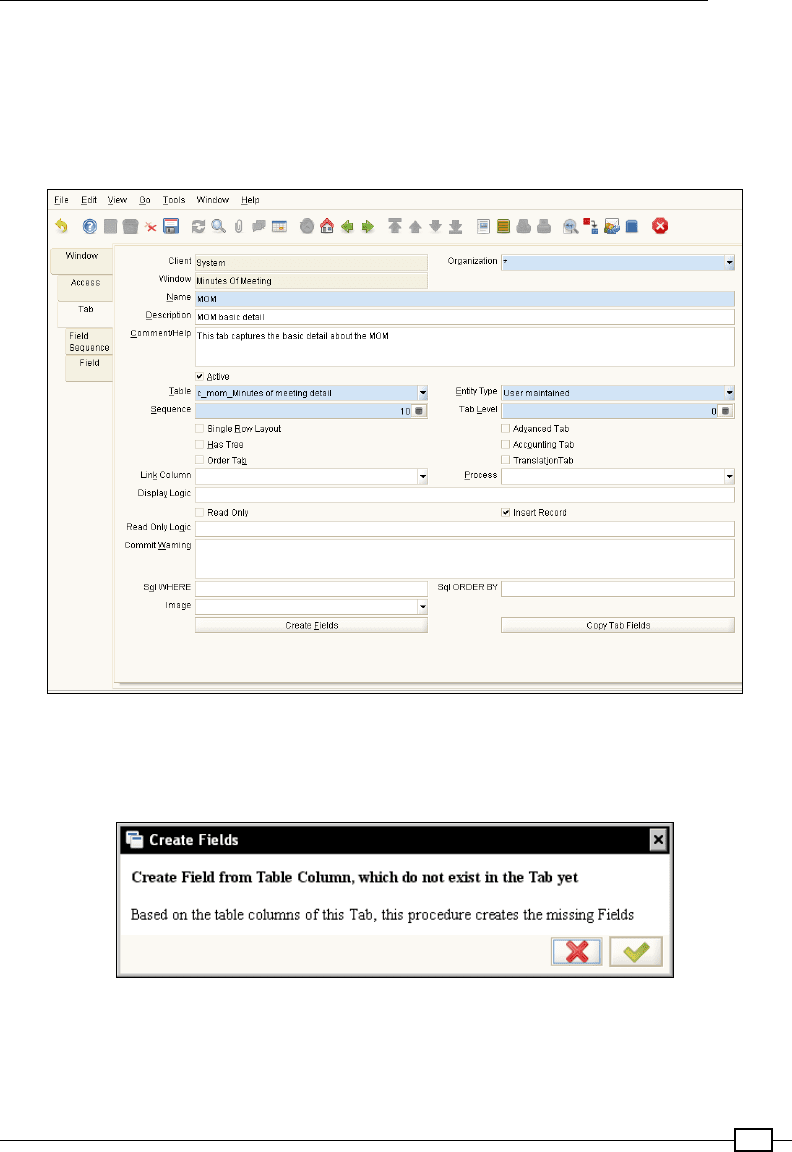
14. Click on the Tab tab and click on the New Record toolbar button. Fill in the details
about the rst tab of MOM where we would display the following basic details of
a MOM:
MOM name
Date
Start time
End time
Chapter 2
49
Chairperson
Agenda
An Important eld is:
Table: Select the MOM table that we had created in the previous steps.
15. Click on the Create Fields button to create tab elds from the table columns.
This will pop-up an information window showing additional details about this
process, as shown in the next screenshot. Click on the tick button.
ADempiere Customization – Part I
50
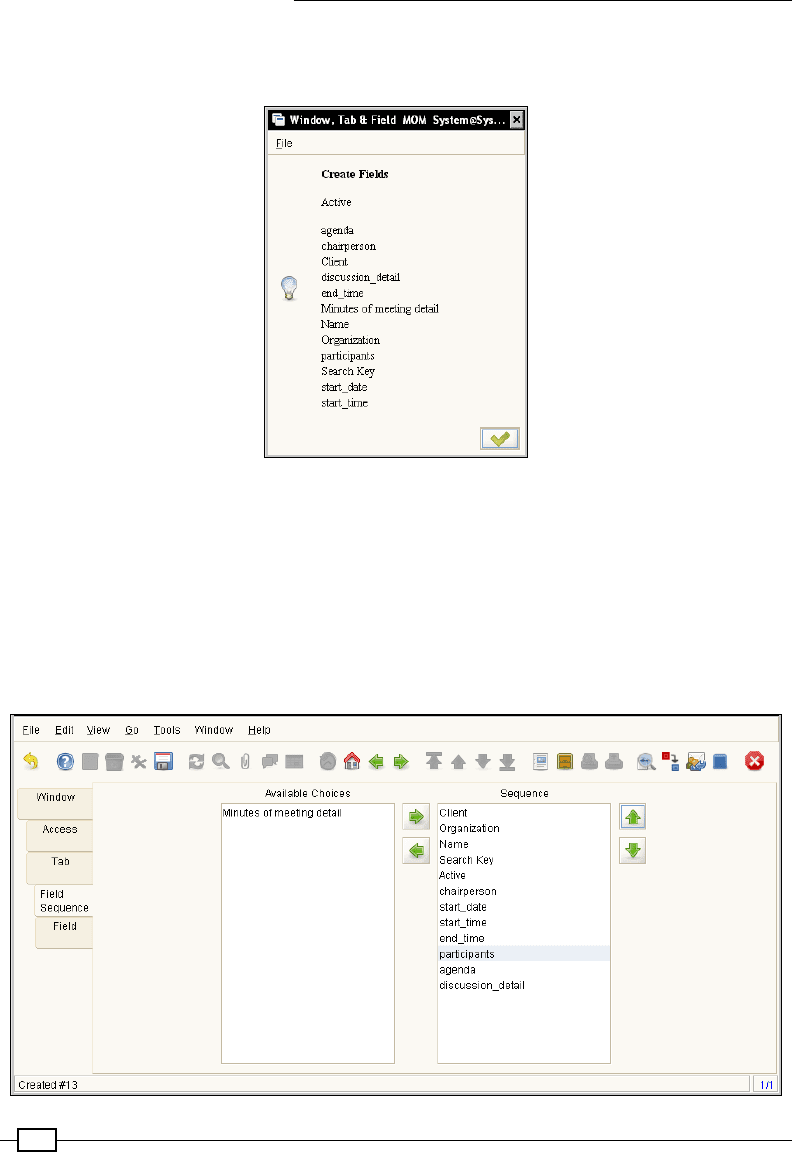
If everything goes well, you will be presented with a list of elds that will be
generated, as shown in the following screenshot:
Click on the tick button. This will complete the process of creating elds from the
table columns.
16. Go to the Field Sequence tab to see the default sequence in which the elds will
appear on the tab. In case you want to change the sequence, you can do it in the
Sequence area. Select the eld, whose sequence you want to change, and use the
up and down arrow keys on the right to change the position of that eld. Alternatively,
you can also use the drag-n-drop for quicker re-ordering. The following screenshot
shows our elds after ordering:
Chapter 2
51
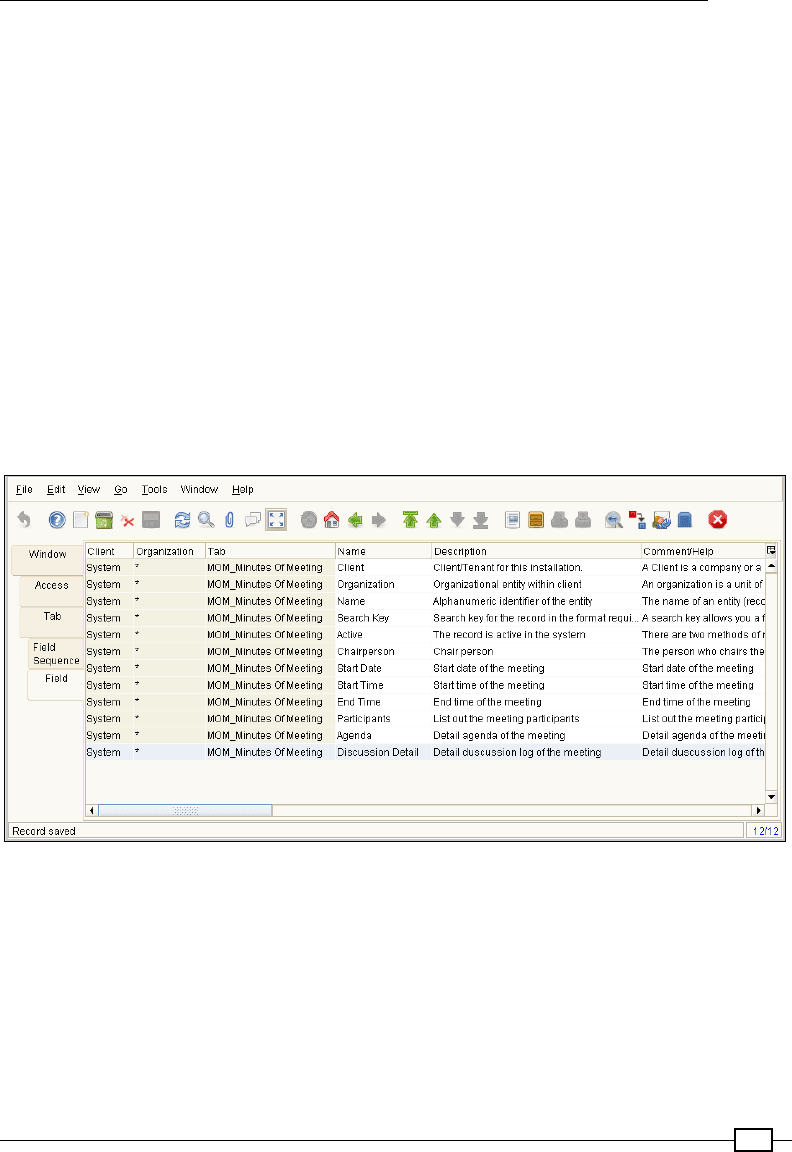
17. Another thing you must have noticed is the eld names. They do not look readable
and do not conform to the human language. For example, names with '_' (underscore)
is not something that we would like to use in our eld labels on the UI. To correct this,
go to the Field tab and correct the Name eld values. As a good practice, also add
in the Description for the elds. ADempiere automatically generates descriptions for
various standard elds like Client, Organization, and so on. So, effectively, you will
have to enter the description for the elds that are specic to your need.
18. Alternatively, you can change the Name, Description, and Comment/Help of the elds
on the Column tab of the Table and Column windows. This is the preferred way if you
want the same name to appear on all the windows/tabs you create using the table.
However, if you need to have different labels on the windows/tabs even though all the
windows/tabs are generated from the same table, then you shall make the changes
on the respective elds on the Window, Tab and Field. An important point to keep in
perspective is that, when you regenerate the tab and elds, the Name, Description,
and Comment/Help of the elds will be overwritten by the ones set on the elds.
19. The following screenshot shows the elds after we have corrected the Name,
Description, and Comment/Help.
ADempiere Customization – Part I
52
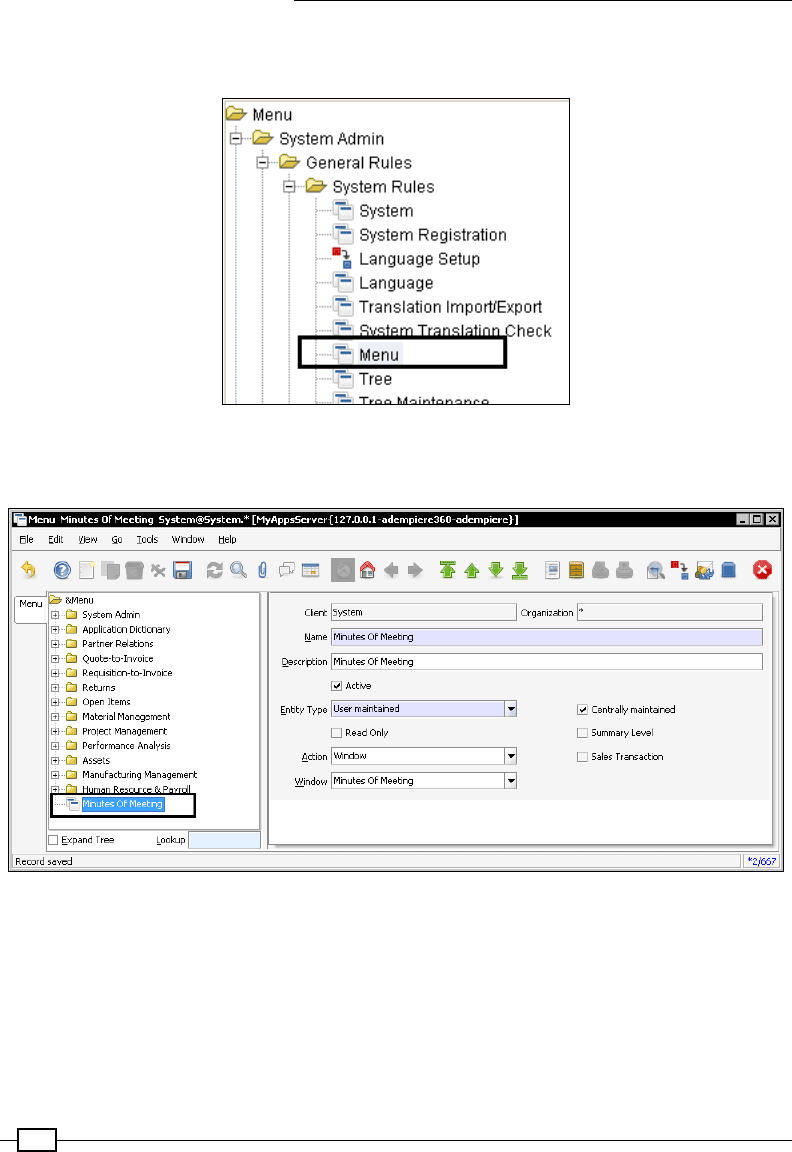
20. Click on Menu | System Admin | General Rules | System Rules | Menu. This pops
up the Lookup Record: Menu window, as shown in the following screenshot:
21. On Lookup Record: Menu window, click on the New Record button in the bottom-left
corner. Fill in the details, as depicted in the following screenshot, and save it.
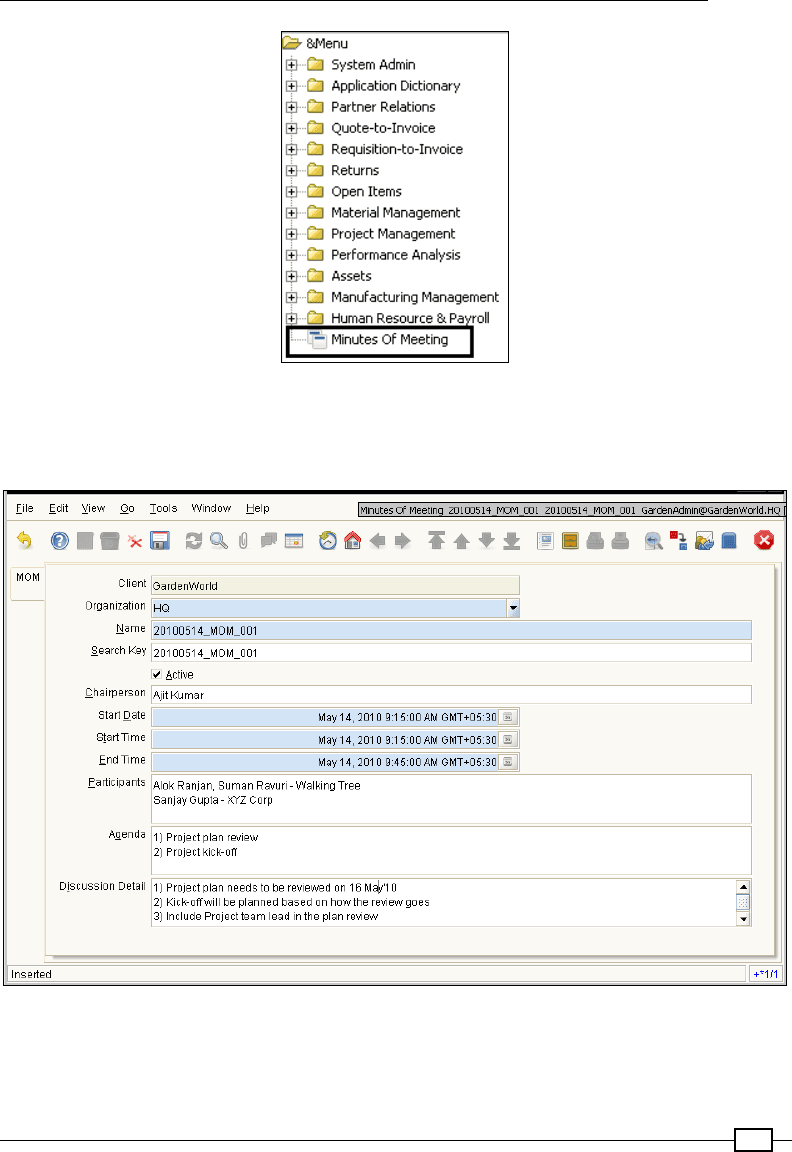
22. Log out and log in as GardenAdmin/GardenAdmin. You will see the following
Minutes Of Meeting menu item:
Chapter 2
53
23. Click on the Minutes Of Meeting menu item. This will bring up the Minutes Of
Meeting window with one tab, MOM. You will now be able to enter your MOM
details and save it, as shown in the following screenshot:
At this stage, we have got our basic MOM window ready where we are able to save/update
the information. As a standard practice in ADempiere, the Search Key shall appear before
the Name eld. We will do this in the later part of this chapter. However, you may work with
the eld sequence to accomplish this.
ADempiere Customization – Part I
54
How it works...
ADempiere has a powerful, yet exible, framework called Application Dictionary. It is called the
core/kernel/heart of ADempiere. To generate the windows, tabs, and elds, ADempiere uses
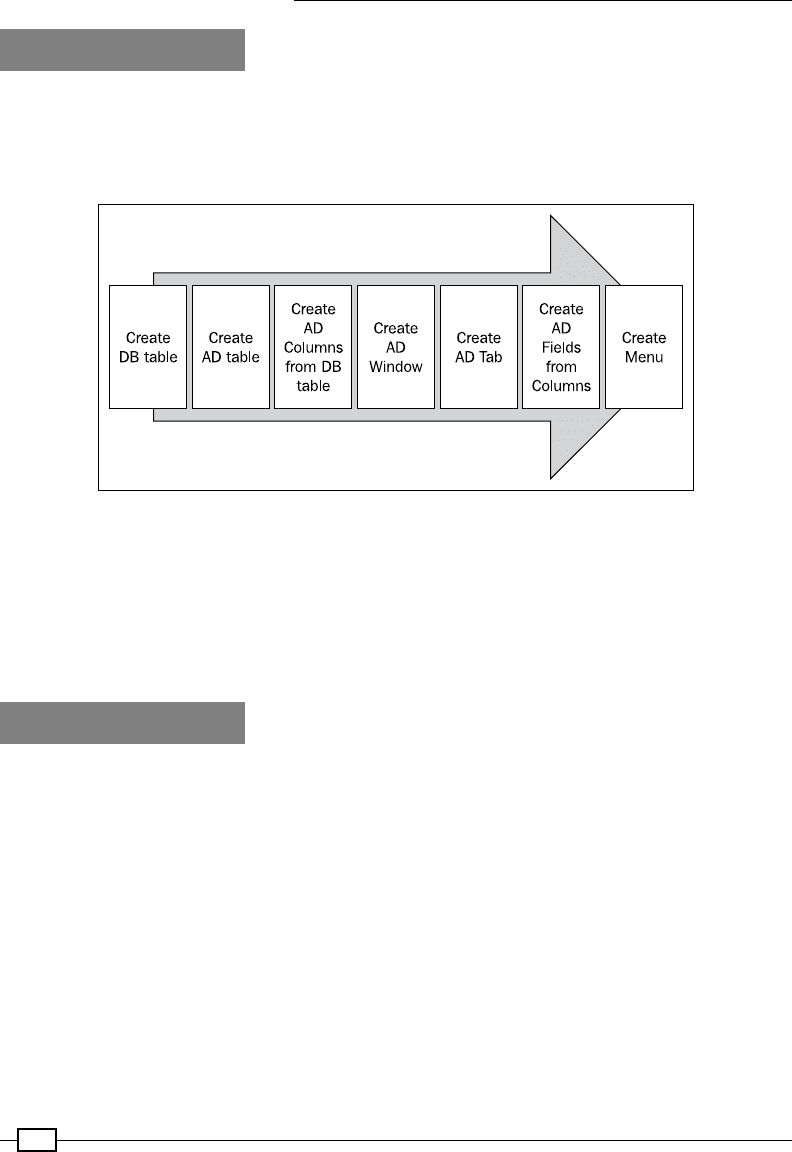
the dictionary. The following diagram depicts the steps involved in creating a new window in
ADempiere (AD stands for Application Dictionary):
f The last step—Create Menu—allows us to access the window
In step 1, we created the database table, c_mom. step 2 through to 9 is where we created the
AD table and columns using the c_mom table. In steps 10 through to 16, we created the AD
window, tab, and elds using the AD table and columns created in the previous steps. After
that we created a menu item and linked the window with it so that the same can be accessed
by a click on the menu item.
There's more...
ADempiere's Application Dictionary is not just about Table, Columns, Window, Tabs, and
Fields; it is much more than this. There are other entities like Process, Report, Workow,
Reference, and so on. ADempiere uses a set of application code and database tables. All
the dictionary related tables have the prex AD_ (for example, AD_Window, AD_Table, and
so on). You may learn more about the Application Dictionary at http://en.wikiversity.
org/wiki/ADempiere_Application_Dictionary.
Chapter 2
55
Customizing an existing window
Practically, there will be a situation when we will have to make changes to the existing
screens. For example, label change, data type change, logically grouping the elds, and so on.
In this recipe, we will take our newly created MOM window and we will customize it further to
understand the process involved in customizing an existing window.
In the previous recipe, our window had a Start Date, Start Time, and End Time. All of them
display both the date and time. Now, say, we want to achieve the following:
f Start Date displays only the date
f Start Time and End Time displays only the time
f Start Time and End Time shall appear in the same line
Given this customization need, let us see how we can achieve it.
How to do it...
1. Log in as System/System with the System Administrator role.
2. Click on the Menu | Application Dictionary | Table and Column menu. This pops up
the lookup window and prompts for table details. Enter the details to nd the MOM
related table.
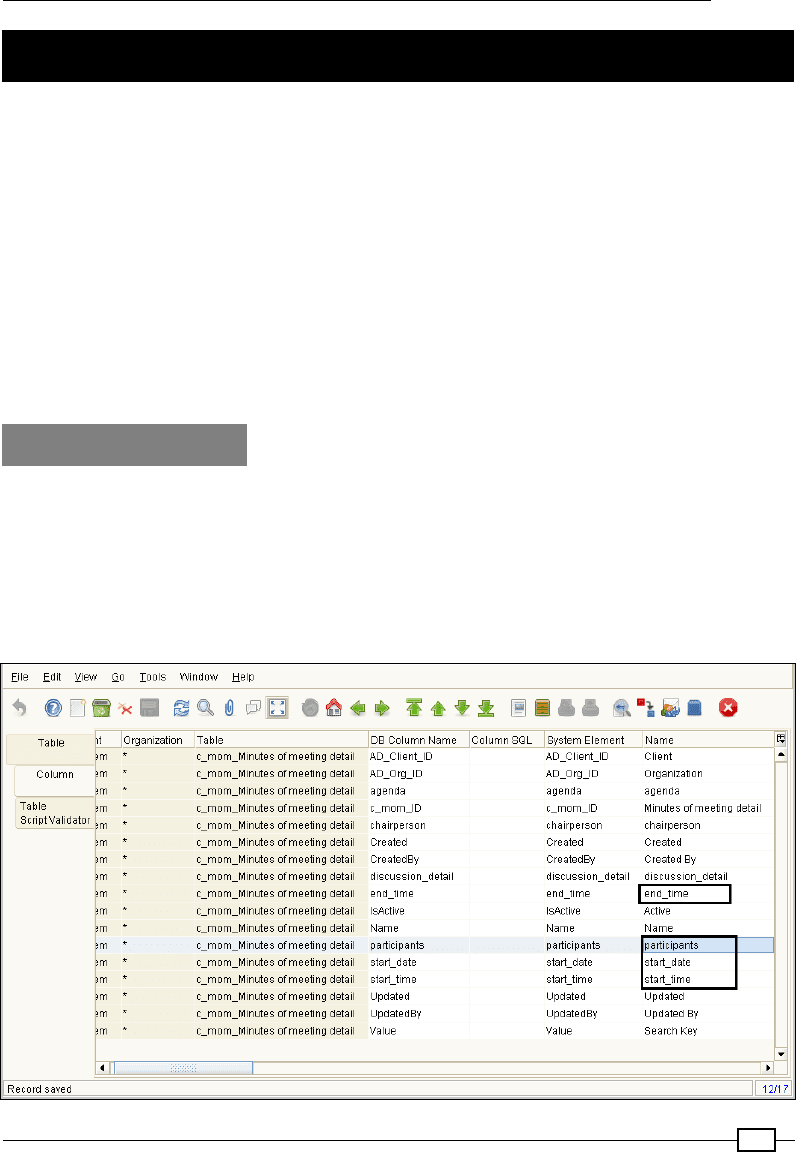
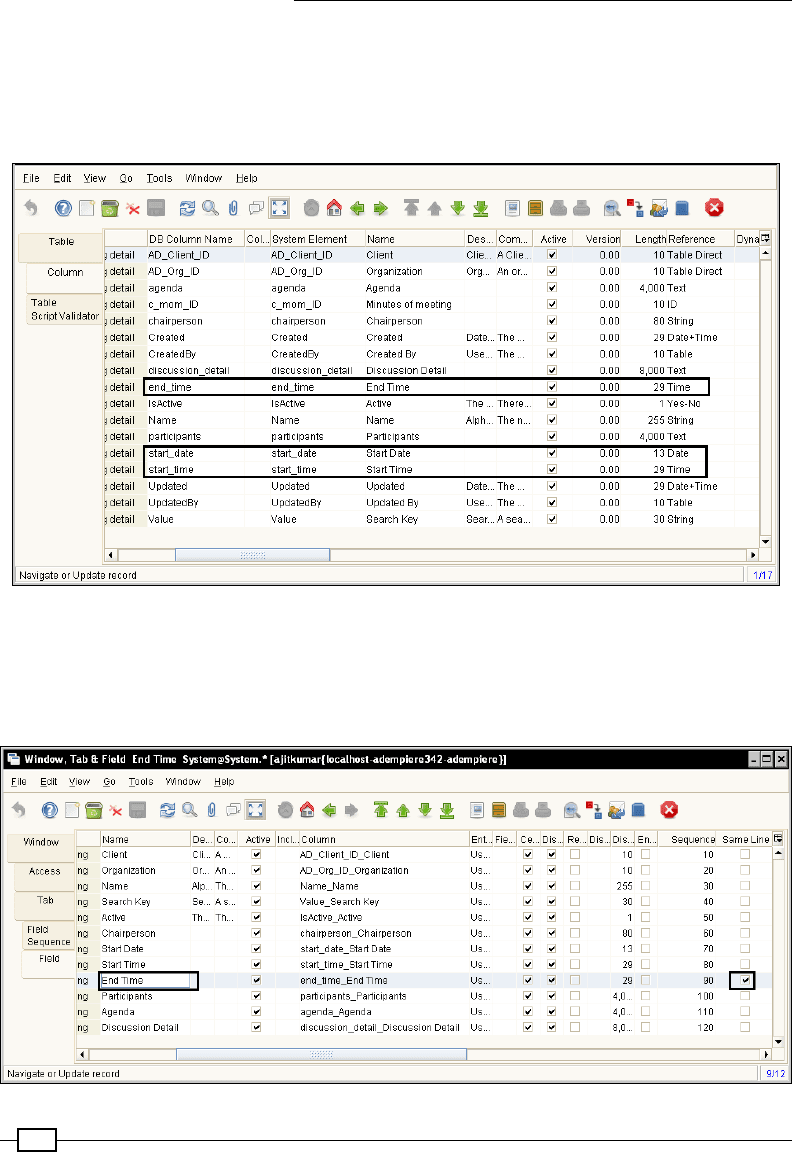
3. Go to the Column tab for the MOM table and take a look at the elds that interest us,
as shown in the following screenshot:
ADempiere Customization – Part I
56
4. Select end_time in the DB Column Name and select Time in the Reference eld.
5. Repeat step 5 for start_time.
6. For start_date, select the Reference eld as Date. The following screenshot shows
the elds with their updated Reference.
7. Go to the Window, Tab, and Field window for the Minutes Of Meeting and go to the
Field tab.
8. Check the Same Line checkbox for the end_time eld to show Start Time and End
Time in the same line, as shown in the following screenshot:
Chapter 2
57
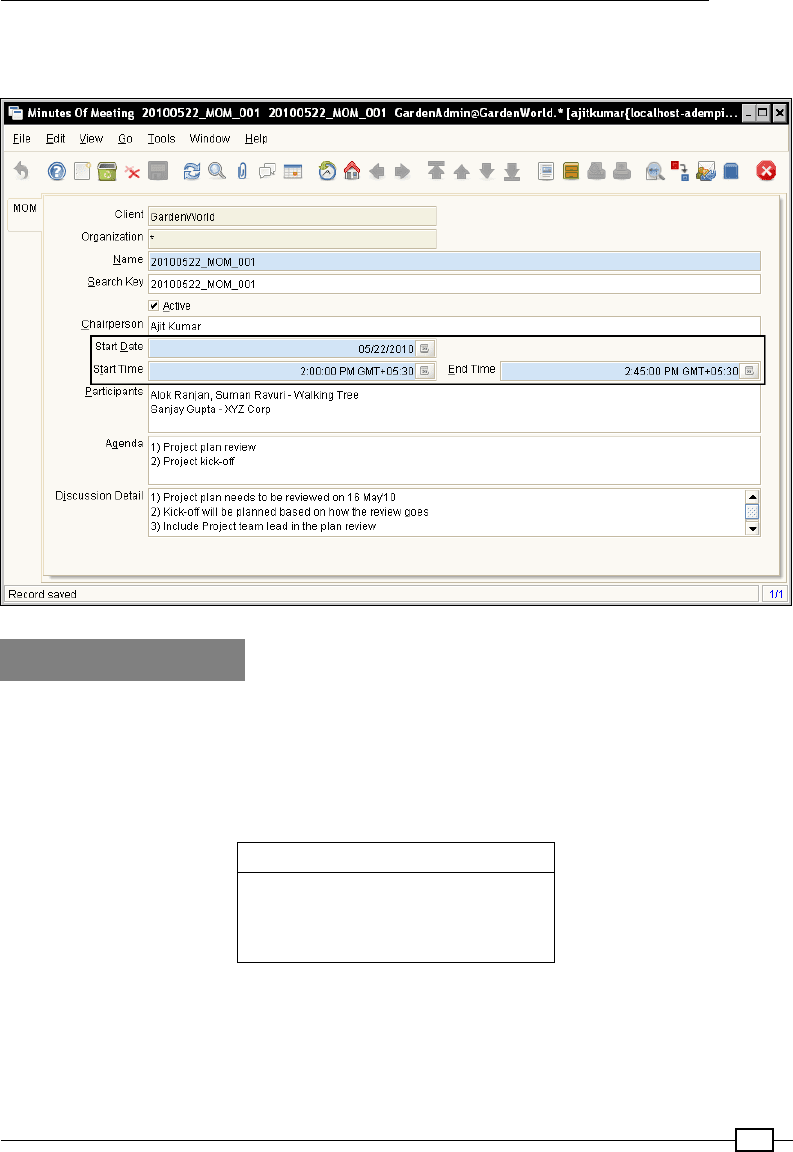
With this, we are done with our customization. The following screenshot shows how the
window looks after the changes:
How it works...
In this recipe, we changed the data types of Start Date, Start Time, and End Time in steps 1
through to 6 and placed Start Time and End Time elds in the same line in the steps 7-8. The
default Reference Date+Time, which ADempiere guesses for the timestamp columns, would
show the date as well as the time. So, in order to change the type, the following is the eld
and Reference mapping:
Field Reference
Start Date Date
Start Time Time
End Time Time
When it comes to showing multiple elds on the same line, ADempiere uses the Same Line
ag at the eld level to determine whether the eld needs to be rendered to the next line or
to the same line. ADempiere uses a two column layout for the tab panel. Hence, at most, only
two elds can be displayed in a single line.