AWS A5.28-96/SFA-5.28 Specification for Low-Alloy Steel Electrodes and Rods for Gas Shielded Arc Welding (Eng)
Подождите немного. Документ загружается.

PART C — SPECIFICATIONS FOR WELDING RODS,
ELECTRODES, AND FILLER METALS SFA-5.28
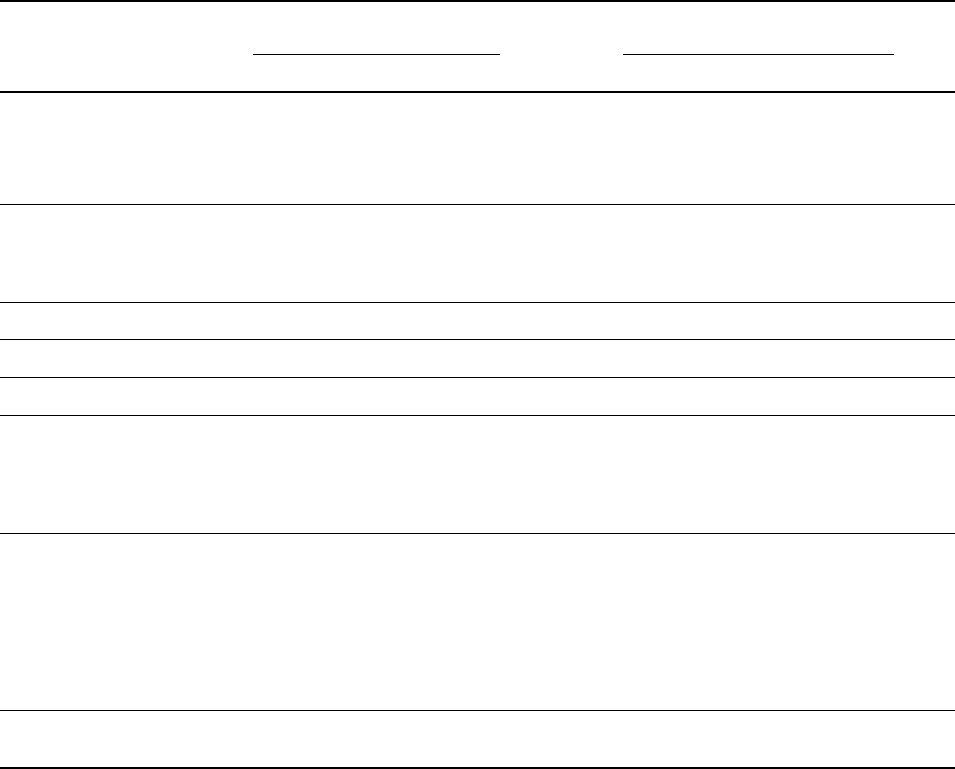
TABLE 7
PREHEAT, INTERPASS, AND POSTWELD HEAT TREATMENT TEMPERATURES
Preheat and Interpass
Temperature
a
PWHT Temperature
a
AWS Classification °F °C °F °C
ER70S-A1
ER80S-B2
ER70S-B2L 275–325 135–165 1150 6 25 620 6 15
E80C-B2
E70C-B2L
ER90S-B3
ER80S-B3L
375–425 185–215 1275 6 25 690 6 15
E90C-B3
E80C-B3L
ER80S-B6 350–450 177–232 1375 6 25 745 6 15
ER80S-B8 400–500 205–260 1375 6 25 745 6 15
ER90S-B9 300–500 150–260 1375 6 25 745 6 15
ER80S-Ni2
ER80S-Ni3
E70C-Ni2 275–325 135–165 1150 6 25 620 6 15
E80C-Ni2
E80C-Ni3
ER80S-D2
ER90S-D2
E90C-D2
ER80S-Ni1
275–325 135–165 None
b
None
b
E80C-Ni1
ER100S-1
ER110S-1
ER120S-1
ERXXXS-G
Conditions as agreed upon between supplier and purchaser
EXXC-G
NOTES:
a. These temperatures are specified for testing under this specification and are not to be considered as recommendations for preheat, interpass,
and postweld heat treatment in production welding. The requirements for production welding must be determined by the user. They may or
may not differ from those called for here.
b. These classifications are normally used in the as-welded condition.
575

SFA-5.28 1998 SECTION II
Quality of Radiographic Testing. The quality level of
inspection shall be 2-2T.
10.3 The soundness of the weld metal meets the
requirements of this specification if the radiograph
shows no cracks, no incomplete fusion, and no rounded
indications in excess of those permitted by the radio-
graphic standards in Fig. 3. In evaluating the radiograph,
1 in. (25 mm) of the weld on each end of the test
assembly shall be disregarded.
10.3.1 A rounded indication is an indication (on
the radiograph) whose length is no more than 3 times
its width. Rounded indications may be circular, elliptical,
conical, or irregular in shape, and they may have tails.
The size of a rounded indication is the largest dimension
of the indication, including any tail that may be present.
The indication may be of porosity or slag. Indications
whose largest dimension does not exceed
1
⁄
64
in. (0.4
mm) shall be disregarded. Test assemblies with indica-
tions larger than the largest indications permitted in
the radiographic standards (Fig. 3) do not meet the
requirements of this specification.
11. Tension Test
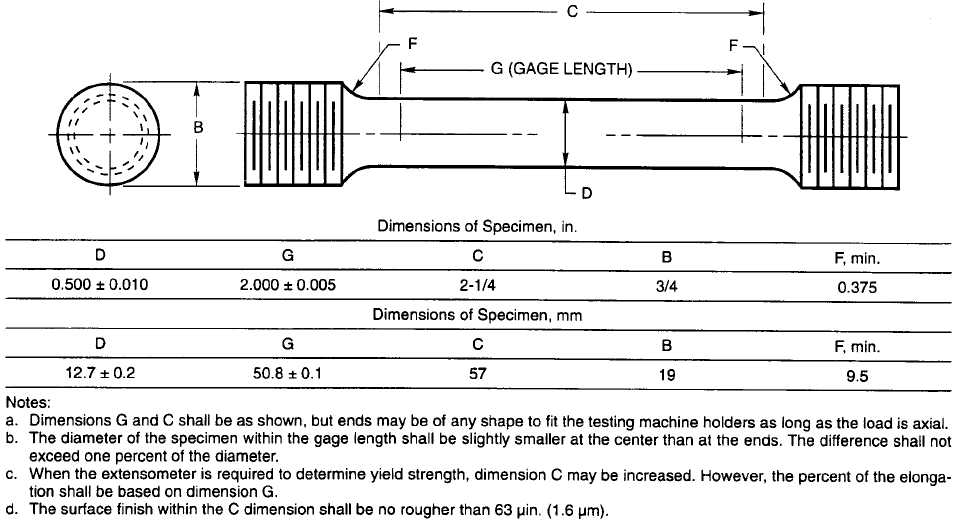
11.1 One all-weld-metal tension test specimen shall
be machined from the groove weld described in 8.3.1
and shown in Fig. 1 as required in Table 5. The
dimensions of the specimen shall be as shown in Fig. 4.
11.2 Before testing, the specimen may be aged at
200 to 220°F (93 to 104°C) for up to 48 hours, then
allowed to cool to room temperature. Refer to A8.3
for a discussion on the purpose of aging treatments.
11.3 The specimen shall be tested in the manner
described in the tension test section of ANSI/AWS
B4.0, Standard Methods for Mechanical Testing of
Welds.
11.4 The results of the all-weld-metal tension test
shall meet the requirements specified in Table 3. Test
reports shall indicate if the specimen was tested in the
aged condition.
12. Impact Test
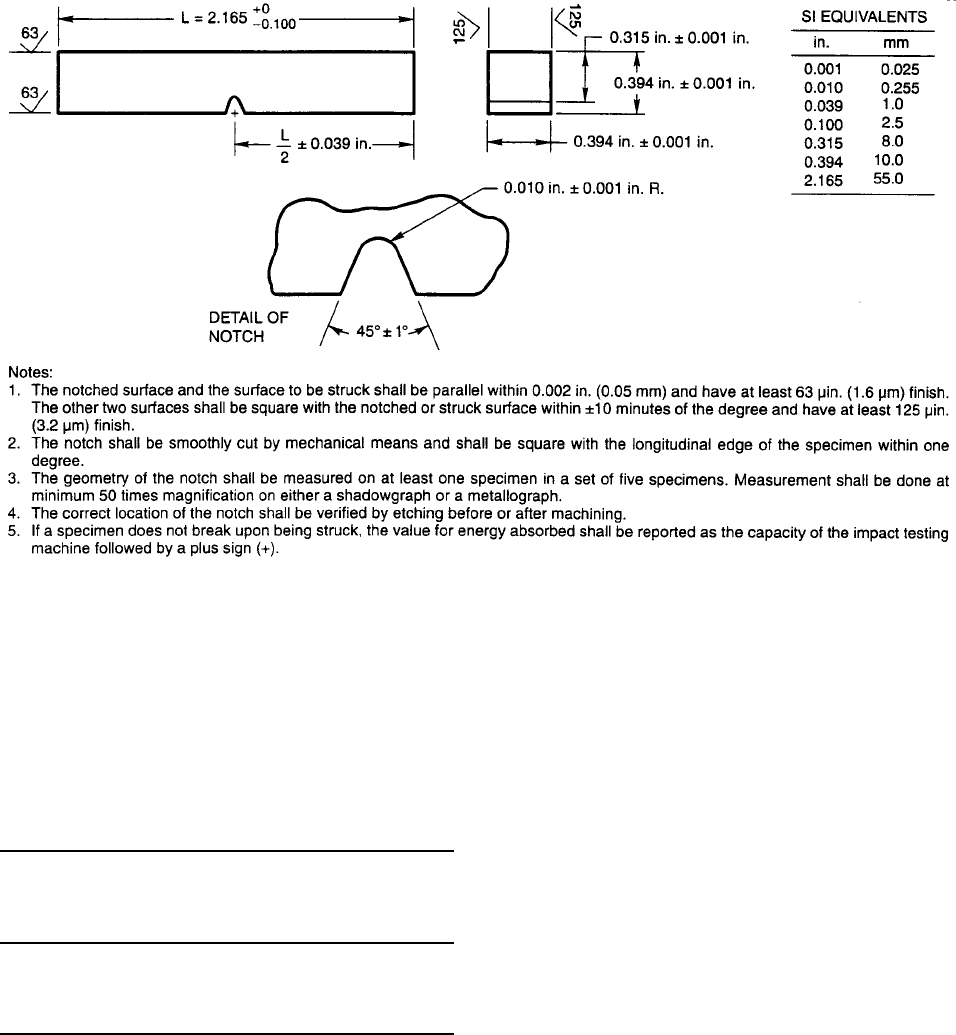
12.1 Five Charpy V-notch impact test specimens
(Fig. 5) shall be machined from the test assembly
shown in Fig. 1, for those classifications for which
impact testing is required in Table 5.
12.2 The five specimens shall be tested in accordance
with the impact test section of ANSI/AWS B4.0,
Standard Methods for Mechanical Testing of Welds.
576
The test temperature shall be that specified in Table
4 for the classification under test.
12.3 In evaluating the test results, the lowest and
the highest values obtained shall be disregarded. For
classifications requiring 20 ft·lbf (27 J), two of the
remaining three values shall equal, or exceed, the
specified 20 ft·lbf (27 J) energy level. One of the three
may be lower, but not lower than 15 ft·lbf (20 J), and
the average of the three shall be not less than the
required 20 ft·lbf (27 J) energy level. For classifications
requiring 50 ft·lbf (68 J), two of the remaining three
values shall equal, or exceed, the specified 50 ft·lbf
(68 J) energy level. One of the three may be lower,
but not lower than 40 ft·lbf (54 J), and the average
of the three shall be not less than the required 50 ft·lbf
(68 J) energy level.
13. Diffusible Hydrogen Test
13.1 For each electrode to be identified by an optional
diffusible hydrogen designator, the 0.045 in. (1.1 mm)
or
1
⁄
16
in. (1.6 mm) size (or the size that the manufacturer
produces that is closest to one of these, if these sizes
are not produced) shall be tested according to one of
the methods given in ANSI /AWS A4.3, Standard Meth-
ods for Determination of the Diffusible Hydrogen Con-
tent of Martensitic, Bainitic, and Ferritic Steel Weld
Metal Produced by Arc Welding. The optional supple-
mental diffusible hydrogen designator may be added
to the classification according to the average test value
as compared to the requirements of Table 8. If the
actual test results for an electrode meet the requirements
for the lower or lowest hydrogen designator as specified
in Table 8, the electrode also meets the requirements
for all higher hydrogen designators in Table 8 without
the need for retest.
13.2 Testing shall be done without rebaking, or
otherwise conditioning the electrode, unless the manu-
facturer recommends otherwise. If the electrode is re-
baked, that fact, along with the method used for rebak-
ing, shall be noted on the test report.
13.3 For purposes of certifying compliance with
optional diffusible hydrogen requirements, the reference
atmospheric condition shall be an absolute humidity of
10 grains of water vapor per pound (1.43 g/kg) of
dry air at the time of welding. The actual atmospheric
conditions shall be reported, along with the average
value for the test according to ANSI/AWS A4.3.
5
5
See A8.2 (in the Annex).

PART C — SPECIFICATIONS FOR WELDING RODS,
ELECTRODES, AND FILLER METALS SFA-5.28
FIG. 3 RADIOGRAPHIC ACCEPTANCE STANDARDS
577
SFA-5.28 1998 SECTION II
FIG. 4 TENSION TEST SPECIMEN
13.4 When the absolute humidity equals or exceeds
the reference condition at the time of preparation of
the test assembly, the test shall be acceptable as demon-
strating compliance with the requirements of this speci-
fication, provided the actual test results satisfy the
diffusible hydrogen requirements for the applicable
optional supplemental designator.
PART C — MANUFACTURE,
IDENTIFICATION, AND PACKAGING
14. Method of Manufacture
The electrodes and rods classified according to this
specification may be manufactured by any method
that will produce electrodes and rods that meet the
requirements of this specification.
15. Standard Sizes
15.1 Standard sizes for electrodes and rods in the
different package forms (straight lengths, coils with
support, coils without support, drums and spools —
see Section 17, Standard Package Forms) are shown
in Table 9.
578
16. Finish and Uniformity
16.1 All electrodes and rods shall have a smooth
finish which is free from slivers, depressions, scratches,
scale, seams, laps (exclusive of the longitudinal joint
in composite metal cored electrodes), and foreign matter
that would adversely affect the welding characteristics,
the operation of the welding equipment, or the properties
of the weld metal.
16.2 Each continuous length of filler metal shall be
from a single heat or lot of material, and welds, when
present, shall have been made so as not to interfere
with the uniform, uninterrupted feeding of the filler
metal on automatic and semiautomatic equipment.
16.3 The components in composite electrodes (includ-
ing the core ingredients in metal cored electrodes) shall
be distributed with sufficient uniformity throughout the
length of the electrode so as not to adversely affect
the performance of the electrode or the properties of
the weld metal.
16.4 A suitable protective coating may be applied
to any filler metal in this specification. Copper may
be used as a coating for any classification.
PART C — SPECIFICATIONS FOR WELDING RODS,
ELECTRODES, AND FILLER METALS SFA-5.28
FIG. 5 CHARPY V-NOTCH IMPACT TEST SPECIMEN
TABLE 8
OPTIONAL DIFFUSIBLE HYDROGEN
REQUIREMENTS
a
Optional Average Diffusible
AWS Supplemental Hydrogen, Maximum
Electrode Diffusible Hydrogen (ml/100g Deposited
Classification Designator
b
Metal)
c
All H16 16.0
All H8 8.0
All H4 4.0
All H2 2.0
NOTES:
a. See Note a to Table 5.
b. This designator is added to the end of the complete electrode
classification designation.
c. Some classifications may not meet the lower average diffusible
hydrogen levels (H8, H4, and H2).
579
17. Standard Package Forms
17.1 Standard package forms are straight lengths,
coils with support, coils without support, spools, and
drums. Standard package dimensions and weights for
each form are given in Table 10. Package forms, sizes,
and weights other than these shall be as agreed between
purchaser and supplier.
17.2 The liners in coils with support shall be designed
and constructed to prevent distortion of the coil during
normal handling and use and shall be clean and dry
enough to maintain the cleanliness of the filler metal.
17.3 Spools shall be designed and constructed to
prevent distortion of the filler metal during normal
handling and use and shall be clean and dry enough
to maintain the cleanliness of the filler metal.
18. Winding Requirements
18.1 Electrodes on spools and in coils (including
drums and reels) shall be wound so that kinks, waves,
sharp bends, overlapping or wedging are not encoun-
tered, leaving the filler metal free to unwind without

SFA-5.28 1998 SECTION II
TABLE 9
STANDARD SIZES
a
Tolerance (6)
Diameter Solid Composite
Standard Package Form in. mm in. mm in. mm
0.045 1.1 0.001 0.02 0.002 0.05
1
⁄
16
0.062 1.6 0.002 0.05 0.002 0.05
5
⁄
64
0.078 2.0 0.002 0.05 0.003 0.08
Straigth Lengths
b3
⁄
32
0.094 2.4 0.002 0.05 0.003 0.08
1
⁄
8
0.125 3.2 0.002 0.05 0.003 0.08
5
⁄
32
0.156 4.0 0.002 0.05 0.003 0.08
3
⁄
16
0.188 4.8 0.002 0.05 0.003 0.08
0.030 0.8 0.001 0.02 0.002 0.05
0.035 0.9 0.001 0.02 0.002 0.05
0.045 1.1 0.001 0.02 0.002 0.05
0.052 1.3 0.002 0.05 0.002 0.05
1
⁄
16
0.062 1.6 0.002 0.05 0.002 0.05
5
⁄
64
0.078 2.0 0.002 0.05 0.003 0.08
3
⁄
32
0.094 2.4 0.002 0.05 0.003 0.08
7
⁄
64
0.109 2.8 0.002 0.05 0.003 0.08
1
⁄
8
0.125 3.2 0.002 0.05 0.003 0.08
Coils with and without Support
0.035 0.9 0.001 0.02 0.002 0.05
0.045 1.1 0.001 0.02 0.002 0.05
0.052 1.3 0.002 0.05 0.002 0.05
1
⁄
16
0.062 1.6 0.002 0.05 0.002 0.05
5
⁄
64
0.078 2.0 0.002 0.05 0.003 0.08
3
⁄
32
0.094 2.4 0.002 0.05 0.003 0.08
7
⁄
64
0.109 2.8 0.002 0.05 0.003 0.08
1
⁄
8
0.125 3.2 0.002 0.05 0.003 0.08
Drums
0.020 0.5 0.001 0.02 0.002 0.05
0.025 0.6 0.001 0.02 0.002 0.05
0.030 0.8 0.001 0.02 0.002 0.05
0.035 0.9 0.001 0.02 0.002 0.05
0.045 1.1 0.001 0.02 0.002 0.05
0.052 1.3 0.002 0.05 0.002 0.05
1
⁄
16
0.062 1.6 0.002 0.05 0.002 0.05
5
⁄
64
0.078 2.0 0.002 0.05 0.003 0.08
3
⁄
32
0.094 2.4 0.002 0.05 0.003 0.08
7
⁄
64
0.109 2.8 0.002 0.05 0.003 0.08
1
⁄
8
0.125 3.2 0.002 0.05 0.003 0.08
Spools
NOTES:
a. Dimensions, sizes, tolerances, and package forms other than those shown shall be as agreed by purchaser and supplier.
b. Length shall be 36 in. 6
1
⁄
2
in. (approximately 900 mm 6 15 mm).
580
PART C — SPECIFICATIONS FOR WELDING RODS,
ELECTRODES, AND FILLER METALS SFA-5.28
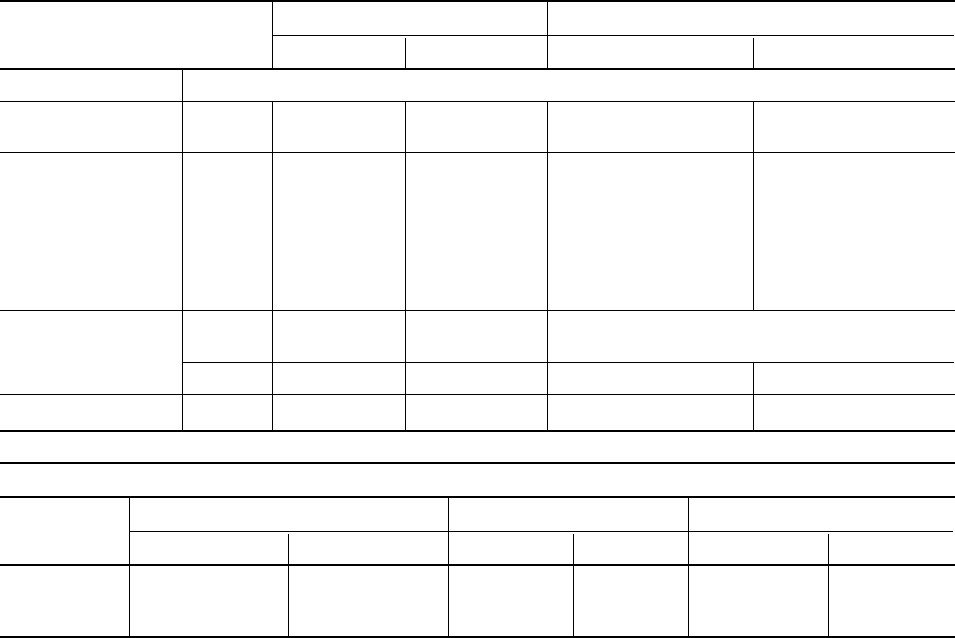
TABLE 10
PACKAGING REQUIREMENTS
a
Package Size Net Weight of Electrode
b
Type of Package
in. mm lb kg (approx.)
Coils without Support As Specified by Purchaser
c
Coils with Support ID 6-
3
⁄
4
170 14 6.4
(See below) ID 12 300 25, 30, 50, and 60 11, 14, 23, and 27
OD 4 100 1-
1
⁄
2
and 2-
1
⁄
2
0.7 and 1.1
OD 8 200 10, 12, and 15 4.5, 5.5, and 6.8
OD 12 300 25, 30, 35, and 44 11, 14, 16, and 20
Spools
d
OD 14 360 50 and 60 23 and 27
OD 22 560 250 110
OD 24 610 300 140
OD 30 760 600, 750, and 1000 270, 340, and 454
OD 15
1
⁄
2
400
As Specified by Purchaser
c
Drums
OD 20 500
OD 23 600 300 and 600 140 and 270
Straight Lengths 36 (long) 900 (long) 10 and 50 4.5 and 22.7
Coils with Support — Standard Dimensions and Weights
Coil Net Weight Inside Diameter of Liner Width of Wound Electrode
Electrode Size lb kg (approx.) in. mm in. max. mm, max.
14 6.4 6-
3
⁄
4
6
1
⁄
8
170 6 33 75
All 25 and 30 11 and 14 12 6
1
⁄
8
305 6 32-
1
⁄
2
or 4-
5
⁄
8
65 or 120
50, 60, and 65 23, 27, and 30 12 6
1
⁄
8
305 6 34-
5
⁄
8
120
NOTES:
a. Sizes and net weights other than those specified may be supplied as agreed between supplier and purchaser.
b. Tolerance on net weight shall be 6 10 percent.
c. As agreed between supplier and purchaser.
d. See Figure 6.
restriction. The outside end of the filler metal (the end
with which welding is to begin) shall be identified so
it can be readily located and shall be fastened to avoid
unwinding.
18.2 The cast and helix of electrodes in coils, spools,
and drums shall be such that the electrode will feed in
an uninterrupted manner in automatic and semiautomatic
equipment.
18.3 The cast and helix of solid filler metal in 4
in. (100 mm) spools shall be such that a specimen
long enough to produce a single loop, when cut from
the spool and laid unrestrained on a flat surface, will:
(1) form a circle not less than 4 in. (100 mm) nor
more than 9 in. (230 mm) in diameter, and
581
(2) rise above the flat surface no more than
1
⁄
2
in.
(13 mm) at any location.
18.4 The cast and helix of solid filler metal on all
other package forms shall be such that a specimen
long enough to produce a single loop, when cut from
the package and laid unrestrained on a flat surface, will:
(1) form a circle not less than 12 in. (305 mm) for
0.030 in (0.8 mm) and smaller sizes; or not less than
15 in. (380 mm) for 0.035 in. (0.9 mm) and larger
sizes, and
(2) rise above the flat surface no more than 1 in.
(25 mm) at any location.
Certain bulk packages may contain wire that has been
elastically twisted or otherwise mechanically treated in
order to provide straighter wire feed. The wire from

SFA-5.28 1998 SECTION II
FIG. 6(a) STANDARD SPOOLS—DIMENSIONS OF 4 in. SPOOLS
these packages will not form a circle when cut. Tradi-
tional cast and helix measurements may have no rele-
vance. Wire thus treated shall conform to the winding
requirements of 18.1 and 18.2. Any method of wire
form inspection shall be as agreed between purchaser
and supplier.
19. Filler Metal Identification
19.1 The product information and the precautionary
information required in Section 21 for marking each
package shall also appear on each coil, spool, and drum.
19.2 Coils without support shall have a tag containing
this information securely attached to the filler metal at
the inside end of the coil.
19.3 Coils with support shall have the information
securely affixed in a prominent location on the support.
19.4 Spools shall have the information securely af-
fixed in a prominent location on the outside of at least
one flange of the spool.
19.5 Drums shall have the information securely af-
fixed in a prominent location on the side of the drum.
582
20. Packaging
Filler metal shall be suitably packaged to ensure
against damage during shipment and storage under
normal conditions.
21. Marking of Packages
21.1 The following product information (as a mini-
mum) shall be legibly marked so as to be visible from
the outside of each unit package:
(1) AWS specification (year of issue may be ex-
cluded) and AWS classification numbers, along with
any optional supplemental designators, if applicable
(2) Supplier’s name and trade designation
(3) Size and net weight
(4) Lot, control, or heat number
21.2 The following precautionary information (as a
minimum) shall be prominently displayed in legible
print on all packages of electrodes and rods, including
individual unit packages enclosed within a larger
package:

PART C — SPECIFICATIONS FOR WELDING RODS,
ELECTRODES, AND FILLER METALS SFA-5.28
FIG. 6(b) STANDARD SPOOLS—DIMENSIONS OF 8, 12, and 14 in. SPOOLS
583

SFA-5.28 1998 SECTION II
FIG. 6(c) STANDARD SPOOLS—DIMENSIONS OF 22, 24, and 30 in. SPOOLS
584
